Introducing react.dev
Today we are thrilled to launch react.dev, the new home for React and its documentation. In this post, we would like to give you a tour of the new site.
March 16, 2023 by Dan Abramov and Rachel Nabors
Today we are thrilled to launch react.dev, the new home for React and its documentation. In this post, we would like to give you a tour of the new site.
tl;dr
- The new React site (react.dev) teaches modern React with function components and Hooks.
- We’ve included diagrams, illustrations, challenges, and over 600 new interactive examples.
- The previous React documentation site has now moved to legacy.reactjs.org.
New site, new domain, new homepage
First, a little bit of housekeeping.
To celebrate the launch of the new docs and, more importantly, to clearly separate the old and the new content, we’ve moved to the shorter react.dev domain. The old reactjs.org domain will now redirect here.
The old React docs are now archived at legacy.reactjs.org. All existing links to the old content will automatically redirect there to avoid “breaking the web”, but the legacy site will not get many more updates.
Believe it or not, React will soon be ten years old. In JavaScript years, it’s like a whole century! We’ve refreshed the React homepage to reflect why we think React is a great way to create user interfaces today, and updated the getting started guides to more prominently mention modern React-based frameworks.
If you haven’t seen the new homepage yet, check it out!
Going all-in on modern React with Hooks
When we released React Hooks in 2018, the Hooks docs assumed the reader is familiar with class components. This helped the community adopt Hooks very swiftly, but after a while the old docs failed to serve the new readers. New readers had to learn React twice: once with class components and then once again with Hooks.
The new docs teach React with Hooks from the beginning. The docs are divided in two main sections:
- Learn React is a self-paced course that teaches React from scratch.
- API Reference provides the details and usage examples for every React API.
Let’s have a closer look at what you can find in each section.
Quick start
The Learn section begins with the Quick Start page. It is a short introductory tour of React. It introduces the syntax for concepts like components, props, and state, but doesn’t go into much detail on how to use them.
If you like to learn by doing, we recommend checking out the Tic-Tac-Toe Tutorial next. It walks you through building a little game with React, while teaching the skills you’ll use every day. Here’s what you’ll build:
import { useState } from 'react';

function Square({ value, onSquareClick }) {
  return (
    <button className="square" onClick={onSquareClick}>
      {value}
    </button>
  );
}

function Board({ xIsNext, squares, onPlay }) {
  function handleClick(i) {
    if (calculateWinner(squares) || squares[i]) {
      return;
    }
    const nextSquares = squares.slice();
    if (xIsNext) {
      nextSquares[i] = 'X';
    } else {
      nextSquares[i] = 'O';
    }
    onPlay(nextSquares);
  }

  const winner = calculateWinner(squares);
  let status;
  if (winner) {
    status = 'Winner: ' + winner;
  } else {
    status = 'Next player: ' + (xIsNext ? 'X' : 'O');
  }

  return (
    <>
      <div className="status">{status}</div>
      <div className="board-row">
        <Square value={squares[0]} onSquareClick={() => handleClick(0)} />
        <Square value={squares[1]} onSquareClick={() => handleClick(1)} />
        <Square value={squares[2]} onSquareClick={() => handleClick(2)} />
      </div>
      <div className="board-row">
        <Square value={squares[3]} onSquareClick={() => handleClick(3)} />
        <Square value={squares[4]} onSquareClick={() => handleClick(4)} />
        <Square value={squares[5]} onSquareClick={() => handleClick(5)} />
      </div>
      <div className="board-row">
        <Square value={squares[6]} onSquareClick={() => handleClick(6)} />
        <Square value={squares[7]} onSquareClick={() => handleClick(7)} />
        <Square value={squares[8]} onSquareClick={() => handleClick(8)} />
      </div>
    </>
  );
}

export default function Game() {
  const [history, setHistory] = useState([Array(9).fill(null)]);
  const [currentMove, setCurrentMove] = useState(0);
  const xIsNext = currentMove % 2 === 0;
  const currentSquares = history[currentMove];

  function handlePlay(nextSquares) {
    const nextHistory = [...history.slice(0, currentMove + 1), nextSquares];
    setHistory(nextHistory);
    setCurrentMove(nextHistory.length - 1);
  }

  function jumpTo(nextMove) {
    setCurrentMove(nextMove);
  }

  const moves = history.map((squares, move) => {
    let description;
    if (move > 0) {
      description = 'Go to move #' + move;
    } else {
      description = 'Go to game start';
    }
    return (
      <li key={move}>
        <button onClick={() => jumpTo(move)}>{description}</button>
      </li>
    );
  });

  return (
    <div className="game">
      <div className="game-board">
        <Board xIsNext={xIsNext} squares={currentSquares} onPlay={handlePlay} />
      </div>
      <div className="game-info">
        <ol>{moves}</ol>
      </div>
    </div>
  );
}

function calculateWinner(squares) {
  const lines = [
    [0, 1, 2],
    [3, 4, 5],
    [6, 7, 8],
    [0, 3, 6],
    [1, 4, 7],
    [2, 5, 8],
    [0, 4, 8],
    [2, 4, 6],
  ];
  for (let i = 0; i < lines.length; i++) {
    const [a, b, c] = lines[i];
    if (squares[a] && squares[a] === squares[b] && squares[a] === squares[c]) {
      return squares[a];
    }
  }
  return null;
}
We’d also like to highlight Thinking in React—that’s the tutorial that made React “click” for many of us. We’ve updated both of these classic tutorials to use function components and Hooks, so they’re as good as new.
Learn React step by step
We’d like everyone in the world to have an equal opportunity to learn React for free on their own.
This is why the Learn section is organized like a self-paced course split into chapters. The first two chapters describe the fundamentals of React. If you’re new to React, or want to refresh it in your memory, start here:
- Describing the UI teaches how to display information with components.
- Adding Interactivity teaches how to update the screen in response to user input.
The next two chapters are more advanced, and will give you a deeper insight into the trickier parts:
- Managing State teaches how to organize your logic as your app grows in complexity.
- Escape Hatches teaches how you can “step outside” React, and when it makes most sense to do so.
Every chapter consists of several related pages. Most of these pages teach a specific skill or a technique—for example, Writing Markup with JSX, Updating Objects in State, or Sharing State Between Components. Some of the pages focus on explaining an idea—like Render and Commit, or State as a Snapshot. And there are a few, like You Might Not Need an Effect, that share our suggestions based on what we’ve learned over these years.
You don’t have to read these chapters as a sequence. Who has the time for this?! But you could. Pages in the Learn section only rely on concepts introduced by the earlier pages. If you want to read it like a book, go for it!
Check your understanding with challenges
Most pages in the Learn section end with a few challenges to check your understanding. For example, here are a few challenges from the page about Conditional Rendering.
You don’t have to solve them right now! Unless you really want to.
Tantangan 1 dari 2: Show an icon for incomplete items with ? :
Use the conditional operator (cond ? a : b) to render a ❌ if isPacked isn’t true.
function Item({ name, isPacked }) {
  return (
    <li className="item">
      {name} {isPacked && '✔'}
    </li>
  );
}

export default function PackingList() {
  return (
    <section>
      <h1>Sally Ride's Packing List</h1>
      <ul>
        <Item
          isPacked={true}
          name="Space suit"
        />
        <Item
          isPacked={true}
          name="Helmet with a golden leaf"
        />
        <Item
          isPacked={false}
          name="Photo of Tam"
        />
      </ul>
    </section>
  );
}
Notice the “Show solution” button in the left bottom corner. It’s handy if you want to check yourself!
Build an intuition with diagrams and illustrations
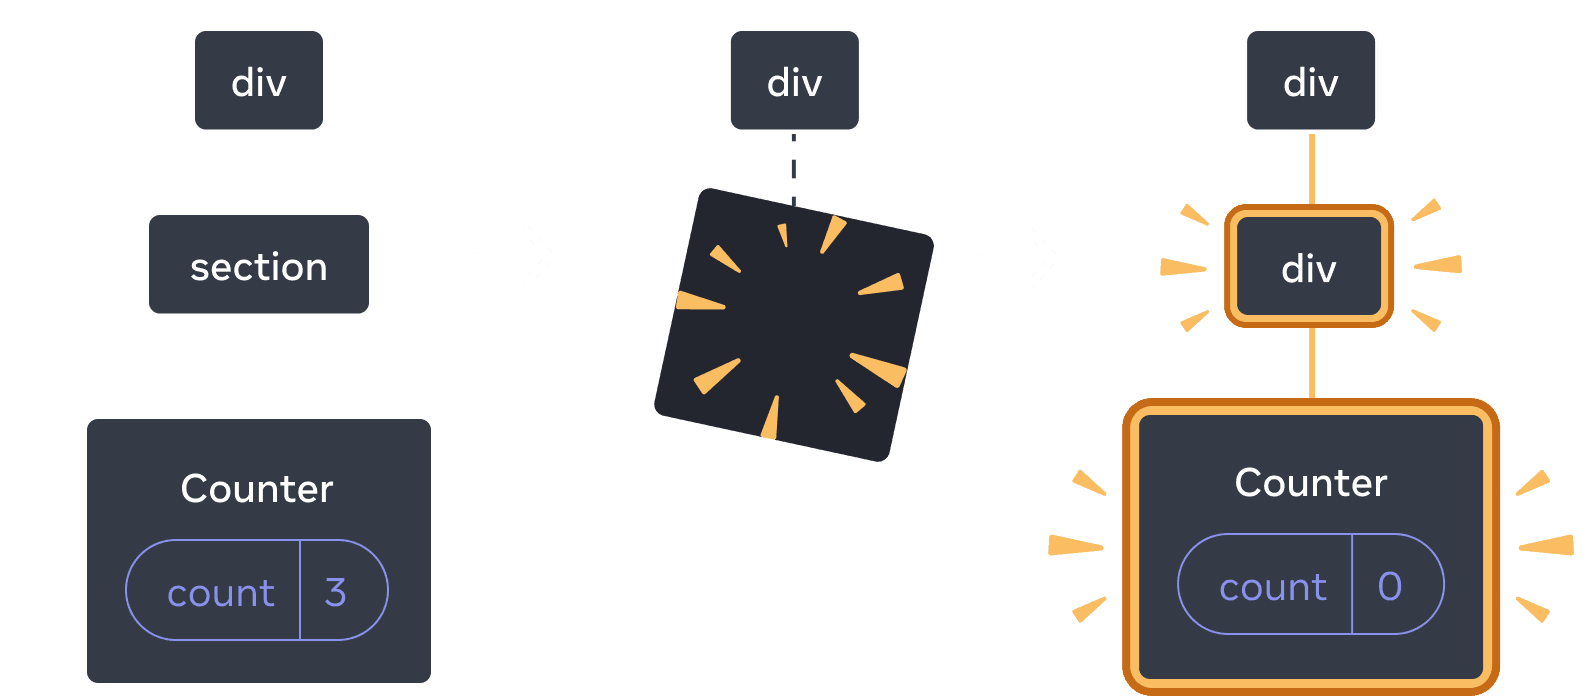
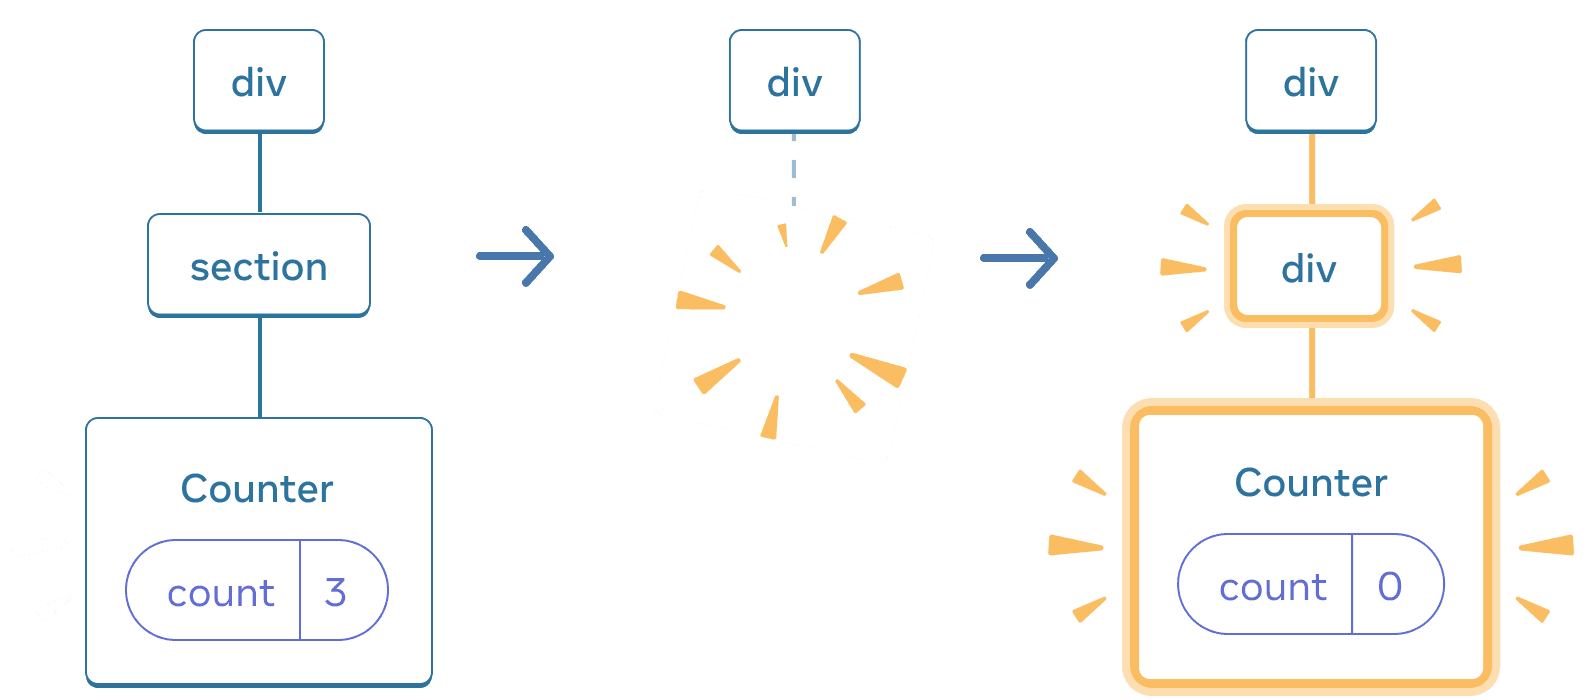
When we couldn’t figure out how to explain something with code and words alone, we’ve added diagrams that help provide some intuition. For example, here is one of the diagrams from Preserving and Resetting State:


When section changes to div, the section is deleted and the new div is added
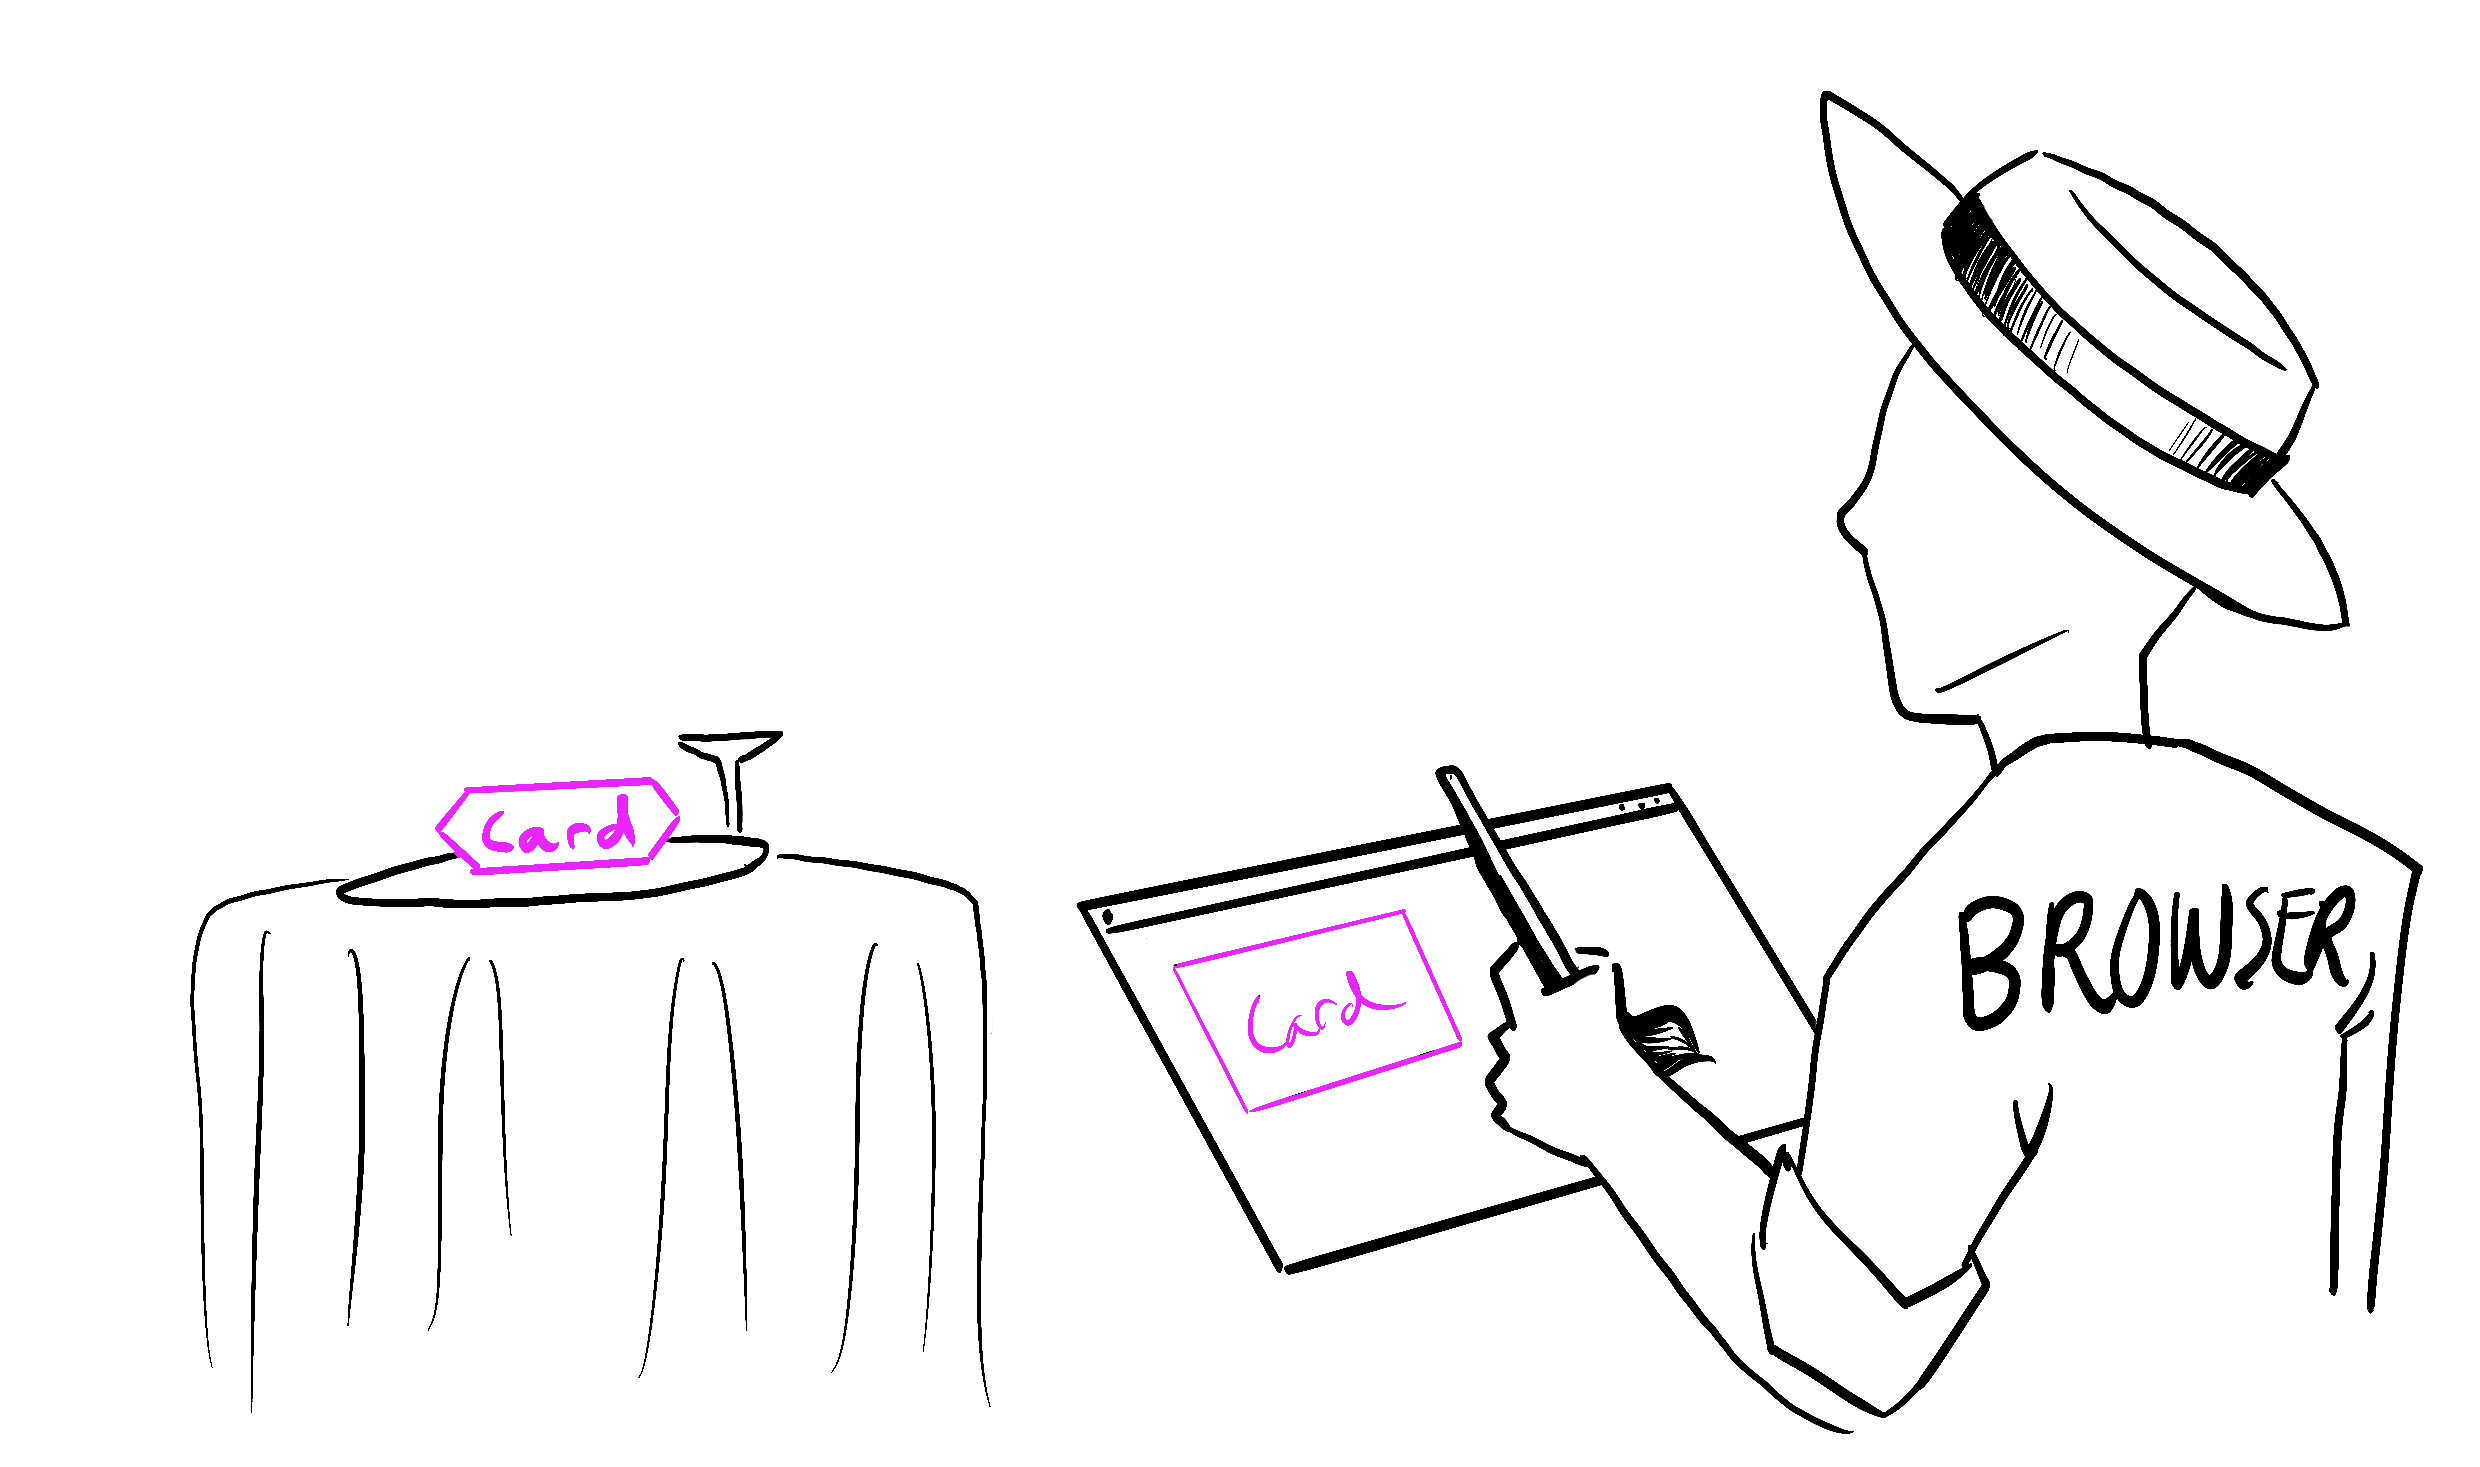
You’ll also see some illustrations throughout the docs—here’s one of the browser painting the screen:

Ilustrasi oleh Rachel Lee Nabors
We’ve confirmed with the browser vendors that this depiction is 100% scientifically accurate.
A new, detailed API Reference
In the API Reference, every React API now has a dedicated page. This includes all kinds of APIs:
- Built-in Hooks like
useState. - Built-in components like
<Suspense>. - Built-in browser components like
<input>. - Framework-oriented APIs like
renderToPipeableStream. - Other React APIs like
memo.
You’ll notice that every API page is split into at least two segments: Reference and Usage.
Reference describes the formal API signature by listing its arguments and return values. It’s concise, but it can feel a bit abstract if you’re not familiar with that API. It describes what an API does, but not how to use it.
Usage shows why and how you would use this API in practice, like a colleague or a friend might explain. It shows the canonical scenarios for how each API was meant to be used by the React team. We’ve added color-coded snippets, examples of using different APIs together, and recipes that you can copy and paste from:
Contoh 1 dari 4: Counter (number)
In this example, the count state variable holds a number. Clicking the button increments it.
import { useState } from 'react';

export default function Counter() {
  const [count, setCount] = useState(0);

  function handleClick() {
    setCount(count + 1);
  }

  return (
    <button onClick={handleClick}>
      You pressed me {count} times
    </button>
  );
}
Some API pages also include Troubleshooting (for common problems) and Alternatives (for deprecated APIs).
We hope that this approach will make the API reference useful not only as a way to look up an argument, but as a way to see all the different things you can do with any given API—and how it connects to the other ones.
What’s next?
That’s a wrap for our little tour! Have a look around the new website, see what you like or don’t like, and keep the feedback coming in the anonymous survey or in our issue tracker.
We acknowledge this project has taken a long time to ship. We wanted to maintain a high quality bar that the React community deserves. While writing these docs and creating all of the examples, we found mistakes in some of our own explanations, bugs in React, and even gaps in the React design that we are now working to address. We hope that the new documentation will help us hold React itself to a higher bar in the future.
We’ve heard many of your requests to expand the content and functionality of the website, for example:
- Providing a TypeScript version for all examples;
- Creating the updated performance, testing, and accessibility guides;
- Documenting React Server Components independently from the frameworks that support them;
- Working with our international community to get the new docs translated;
- Adding missing features to the new website (for example, RSS for this blog).
Now that react.dev is out, we will be able to shift our focus from “catching up” with the third-party React educational resources to adding new information and further improving our new website.
We think there’s never been a better time to learn React.
Who worked on this?
On the React team, Rachel Nabors led the project (and provided the illustrations), and Dan Abramov designed the curriculum. They co-authored most of the content together as well.
Of course, no project this large happens in isolation. We have a lot of people to thank!
Sylwia Vargas overhauled our examples to go beyond “foo/bar/baz” and kittens, and feature scientists, artists and cities from around the world. Maggie Appleton turned our doodles into a clear diagram system.
Thanks to David McCabe, Sophie Alpert, Rick Hanlon, Andrew Clark, and Matt Carroll for additional writing contributions. We’d also like to thank Natalia Tepluhina and Sebastian Markbåge for their ideas and feedback.
Thanks to Dan Lebowitz for the site design and Razvan Gradinar for the sandbox design.
On the development front, thanks to Jared Palmer for prototype development. Thanks to Dane Grant and Dustin Goodman from ThisDotLabs for their support on UI development. Thanks to Ives van Hoorne, Alex Moldovan, Jasper De Moor, and Danilo Woznica from CodeSandbox for their work with sandbox integration. Thanks to Rick Hanlon for spot development and design work, finessing our colors and finer details. Thanks to Harish Kumar and Luna Ruan for adding new features to the site and helping maintain it.
Huge thanks to the folks who volunteered their time to participate in the alpha and beta testing program. Your enthusiasm and invaluable feedback helped us shape these docs. A special shout out to our beta tester, Debbie O’Brien, who gave a talk about her experience using the React docs at React Conf 2021.
Finally, thanks to the React community for being the inspiration behind this effort. You are the reason we do this, and we hope that the new docs will help you use React to build any user interface that you want.